About Me

My photo
Hey, it's Chelsy, with a Y! I am a wife to my sweet prince, and mother to one spunky little princess and one handsome little ham of a prince. Painting is my drug of choice. Wine is good too. I'm known to speak without thinking and eat to much chocolate. I love meeting new people, and learning new things. So this is my journey through some not so glorious moments, some not so intelligent thoughts and some possibly crafty ideas.

Total Pageviews

Powered by Blogger.
Powered By Blogger

Tuesday, September 29, 2009

DIY Day--Height Chart

 I have been searching and searching everywhere for a growth chart for the little lady of the house, but haven't been able to find one. At least not one in our budget! So, I decided "I bet I could make one...mabybe!" And what better way to try something then with stuff you already have on hand?! That way if it doesn't work your not out anything. So here's what I did, and you can do it also, it was way easy. It was, however a little time consuming but it would be a perfect nap time project!

Here's what you need:
*Long piece of wood, I used a 1x6 (doesn't everyone have scrap wood laying around their house?!)
*Spray Paint
*Tape measure
*Paint Pen
*Modge Podge
*Stickers, flowers, rhinestones, ribbon, anything to add some character to it

(BTW- this is my first tutorial so please bear with me!)

Step One:
Spray paint your wood whatever color you like, I used white because.... well.... hmmm....I guess just because I like white! Then I sanded down the edges to make them a little rounded and sanded various parts of the board to look a little worn. (please ignore my ugly light switch and the awful lighting)


Step Two:

After your paint dries, take your tape measure and measure about 1 1/2inches in from the width of the board and make a mark. Then draw a straight line all the way down from that mark to the other end of the board. Then make your marks, I used a yard stick for this part because it laid flatter on the board. I marked every 1/4in., 1/2in. and 1in.


Step Three:
Take your paint pen and go over the lines you made with your pencil. If your that good, you can eliminate the pencil all together and just use your pen, but I am not that good!


Step Four:
While your paint is drying you can start working on your embellishments. I drew letters onto the back of scrapbook paper to spell out her name. You can also put your scrapbook paper in your printer and print off the letters onto the back, just click the "mirror image" button before you print. Our printer is out of ink (it seems like it is always out of ink), so I had to do it the old fashioned way! I cut out numbers, but they seemed too big to me, so I just used stickers instead. I  used some chip board pieces to give it a little definition.


Step 5:
Cover your whole board with a thick coat of modge podge and let dry. Then position your letters and numbers where you want them to make sure they look ok before you glue them. Once you have decided, glue them on and add another coat of modge podge.


Step 6:
And finally came the flower and ribbon because it looked like it needed a little somthin, somthin extra! Hang up your growth chart and measure your little weed! I used pink and green on mine because I had the perfect spot to hang it in her room. But you can do whatever colors you like and hang it anywhere, in the bathroom, the kitchen, the playroom! Be creative, I know you are :) I am going to link this to DIY Day over at "A Soft Place to Land" there are so many fun things over there, you should check it out!! Have a great Tuesday!


P.S. Remember I said this was "scrap wood" so it wasn't actually 6ft. It was only 4 1/2, so I made sure the "half was on the bottom and marked it 2ft. Then I measured 18in. from the floor up  and marked the wall to make sure that's where the bottom of the board went! I hope this little lady isn't 6ft tall one day, but if she is I will be prepared :)

P.S.S. Yessssss, the "a" is backwards, please don't judge me! I was so excited that it was all coming together and I got in too big of a hurry!


Friday, September 25, 2009

Mantle MakeOver!


Here is the before:


The plate is just an old pie plate that I had, probably from a garage sale! I will post a tutorial for it hopefully tomorrow! It's super easy and only takes, oh probably ten minutes if you can get it done un-interupted, which isn't possible in this household! So, it took me about an hour!!
I love the tree branches! I have been seeing them everywhere! It was a fun project, because Miss Taylor got to help pick branches! All I did was very lightly spray them white. I am making some halloween decorations to hang on them and am probably going to paint them black! The hubs has a strict no decorating rule until it's that holliday's month! I'm D.Y.I.N.G. to get up some spooky stuff! The picture hanging on them now is a little treasure I found at my Nanny's! It's the lyrics to "Amazing Grace" that I made for her in vacation bible school one year, it looked like fall so I hung it up!

Next on my mantle are these lovely vases! Or should I say glasses?! I took some cute scrapbook paper and cut it down to fit inside the glass, then just rolled it up and stuck it in there! I didn't glue it or anything, it just paper in a glass :) Because I have every intention of changing it come Oct. 1!

I'm not to big on the idea of the deer picture up there or the Live, Laugh, Love one, I just didn't have anywhere else to put the deer and the other once again, looked like fall! Any suggestions?! So, what do you think of my first makeover? I am also considering painting the wall behind, and possibly even the mantle....What do you think?!

Oh, and here is a sneak peak of something I made for my bathroom makeover! Stay tuned for that! And no, it doesn't match anything in there, but I just had to hang it up and see what it looked like in all it's glory! It is probably going to get painted during the makeover, along with everything else in there!

Hope you all have a great weekend, Taylor and I are headed to the city for a b-day party! It's "Transformers" can you imagine how excited she is?


Wednesday, September 23, 2009

Say What?!

Well, here you go in case you were wondering! I don't think it was presented this way to me, but I love it anyways! Happy wednesday!


POSITION:
Mom, Mommy, Mama, Ma
Dad, Daddy, Dada, Pa, Pop

JOB DESCRIPTION:

Long term, team players needed, for challenging,
permanent work in an
often chaotic environment.
Candidates must possess excellent communication
and organizational skills and be willing to work
variable hours, which will include evenings and weekends
and frequent 24 hour shifts on call.
Some overnight travel required, including trips to
primitive camping sites on rainy weekends and endless sports tournaments
in far away cities!
Travel expenses not reimbursed.
Extensive courier duties also required.

RESPONSIBILITIES:

The rest of your life.
Must be willing to be hated, at least temporarily,
until someone needs $5.
Must be willing to bite tongue repeatedly..
Also, must possess the physical stamina of a
pack mule
and be able to go from zero to 60 mph in three seconds flat
in case, this time, the screams from
the backyard are not someone just crying wolf.
Must be willing to face stimulating technical challenges,
such as small gadget repair, mysteriously sluggish toilets
and stuck zippers.
Must screen phone calls, maintain calendars and
coordinate production of multiple homework projects.
Must have ability to plan and organize social gatherings
for clients of all ages and mental outlooks.
Must be a willing to be indispensable one minute,
an embarrassment the next.
Must handle assembly and product safety testing of a
half million cheap, plastic toys, and battery operated devices.
Must always hope for the best but be prepared for the worst.
Must assume final, complete accountability for
the quality of the end product.
Responsibilities also include floor maintenance and
janitorial work throughout the facility.

POSSIBILITY FOR ADVANCEMENT & PROMOTION:

None.
Your job is to remain in the same position for years, without complaining,
constantly retraining and updating your skills,
so that those in your charge can ultimately surpass you

PREVIOUS EXPERIENCE:

None required unfortunately.
On-the-job training offered on a continually exhausting basis.

WAGES AND COMPENSATION:

Get this! You pay them!
Offering frequent raises and bonuses.
A balloon payment is due when they turn 18 because
of the assumption that college will help them
become financially independent.
When you die, you give them whatever is left.
The oddest thing about this reverse-salary scheme is that
you actually enjoy it and wish you could only do more.

BENEFITS:

While no health or dental insurance, no pension,
no tuition reimbursement, no paid holidays and
no stock options are offered;
this job supplies limitless opportunities for personal growth,
unconditional love,
and free hugs and kisses for life if you play your cards right.


** FOOTNOTE **
THERE IS NO RETIREMENT -- EVER!!!

Monday, September 21, 2009

Monday Madness

So, if your anything like me, your awesome you have crazy busy weekends and feel like monday comes way to fast! And you don't feel like cooking a big meal on monday night because you just did two loads of dishes and don't feel like doing another, this is when I praise Rachael Ray for her one pot wonders! I hope you enjoy!

Sausage and Shrimp One-Pot
INGREDIENTS:
•2 tablespoons extra virgin olive oil (EVOO)
•1 pound hot or sweet bulk Italian sausage or 1 pound of links, split from casings
•2 cubanelle peppers, seeded and chopped
•1 red onion, chopped
•4 cloves garlic, finely chopped
•Salt and pepper
•1 can fire-roasted diced tomatoes or stewed tomatoes (15 ounces)
•1 cup chicken stock
•1 bay leaf, fresh or dried
•1 pound large, peeled, deveined shrimp
•A handful of basil leaves, torn or shredded
•1/4 cup flat leaf parsley, a handful, chopped
•1 loaf ciabatta bread
PREPERATION:
Pre-heat the oven to 325˚F.

Heat a large, high-sided skillet or Dutch oven over medium to medium-high heat with the EVOO, a couple of turns of the pan. Add the sausage and crumble and brown it for 3-4 minutes, then add the peppers, onions and garlic and season with salt and pepper. Cook for 5 minutes more so that the vegetables start to soften.

Add the tomatoes, stock and bay leaf, then stir and bring up to a boil. Add the shrimp and cover with a tight-fitting lid. Cook for 5 minutes, then uncover and stir in the basil and parsley. Turn off the heat.

Crisp the bread in the hot oven. Serve the stoup in shallow bowls with crusty bread alongside for mopping.

Wednesday, September 16, 2009

Waste-Not Wednesday: Play Make-Up

So, change of plans! I know I said I would post a Halloween tutorial, but if you are in my neck of the woods you would know how HUMID it is and the project I wanted to show you just won't dry, so maybe tomorrow!

But for today a simple and oh so easy craft for your little ladies! I got this idea from the very crafty lady at http://www.notsoidlehands.blogspot.com/ 
What you need:
Old eyeshadow, blush or foundation containers, emptied and washed
Cheap nail polish
1. Empty out your make-up container and wash it with soap and water, make sure it is completely dry before going to step two.
2. Take some cheapy nail polish or some that you bought and just isn't the right color on you and pour it in to the empty container very, very slowly so the little metal beads inside don't fall out.
3. Let dry for about twelve hours, the nail polish will shrink a little so fill it back up then let dry for at least 24 hrs. in a well ventilated area. And your done!
*This is a craft that would probably be better done with out the kiddo's seeing it because it takes so long to dry and you will probably want to let it air out for a few days to get the "nail polish smell" off of it. You wouldn't want your little ones getting high off nail polish fumes now would you?! After the smell is gone you can surprise them with their new make-up! Be creative and make your little one a whole bag of make-up, from foundation to lip gloss! My little drama queen loves these, she's not sure where they all go but she knows they go somewhere on her face, it's so funny to watch her! I hope you enjoy and have fun!
These above pictures are Taylor's eyeshadow and lip gloss! To cute!

Tuesday, September 15, 2009

New look, same blog!

Fall is a time for change, and although I hate, H A T E, haaaaatttteee change....I have decieded to be a rebel a go against my stubborn ways! I have recently decided to go back to school to finish my degree. I will be starting in January if all goes well, so please keep me and my family in your prayers! I will still be happy to make anything I can for you or your little lady because I know the extra cash will help with this. But I am also going to be adding some tutorials and links so that all you happy crafters can these things when your own time permits!I changed the name and design of my blog since it's techinally not a "bow"tique, it's "craft"tique! I will post my first tutorial tomorrow so stay tuned... I will give you a little hint....Halloween!

Saturday, September 12, 2009

It's my 40th....Blog! It's gonna be a good one :)

Here is a little bit of what we did on our rainy day! And yes she is still in her pj's!
Now on a more important note...I just read a very touching and heartfelt story while blog hopping and would encourange all of you lovely readers out in blogland to go on over and read it as well! Here is the link http://greysonsgift.blogspot.com/

Right now hopitals and funeral homes across the country are looking for small, very small blankets to wrap these sweet tiny babies in. In cases of fetal demise the babies are so tiny that even the smallest of blankets is much to big. So, this is where we come in! If you can sew or knit or crochet or know anyone who can you could greatly make even the smallest of differences. Hospitals and funeral homes are looking for blankets that measure 12x12 and 24x24.

This story has pulled at my heartstrings, I can't imagine what the families in need of these must have to endure, and if we can help make them more comfortable in even the smallest way then I know it will make a dramatic difference. I am looking at my sweet girl now and remembering how small she was when she was in the NICU and knowing these sweet babies are half the size she was, or smaller and can't imagine what that must be like, especially since she is currently running around the house in her Daddy's boots with the phone in one hand and a cookie in the other! (she's such a drama queen :)

I am going to go digging for some yarn and start on some blankets! I hope you all have a great weekend and if you are blessed enough to be getting some of this rain I hope your are able to enjoy it!


Tuesday, September 8, 2009

Shirts stitched with love!

So just about every night me and Dan watch a movie to wind down and relax after Taylor goes to bed and some nights I have a really hard time enjoying said movie because all I can think of are things I could be making in the sweat shop! Alas, meet the solution to all of our problems! These shirts are so A DOR A BLE! They can have just about anything put on them that I can draw! And I can make them for boys too! YAY! I'm also in the process of loading some pictures of burp cloths I made to match! Let me know if you need one for a gift or for your little bit!


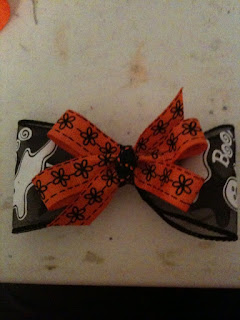
More Halloween Bows!

Well the first one isn't a Halloween bow, but it's one I made for Taylor that I thought was too cute not to share!


Thursday, September 3, 2009

Halloween Bows

These are just a few of the pics I had on my phone that I uploaded, I have a bunch more on my camera so stay tuned for those hopefully in the morning! I also have a bunch of ribbon for Halloween that I haven't even got around to opening! So be prepared for ALOT of Halloween bows to come! Hope you all have a great labor day weekend!


It's that time again!

The weather is getting cooler, the leaves are falling off the trees and it's what??? 102 degrees outside Well there goes my blog about fall! But here are a few fall inspired bows to hold you until the weather finally does cool off, if it ever does! And my next post will hopefully be some of the the Halloween bows I have stashed!


Let me know if you see anything that catches your eye!
Chelsy