Photo Jewelry Ring
I'm sure many of you have seen these photo necklaces: This one is beautiful and only costs....$49. This may not seem like alot to some of you, but for this frugal gal, it's too much :)
Here is mine that was free: I know it's not as pretty as the one above, but free is always beautiful in my book!
Wanna make your own? Here's what you will need to make a ring: (I'm sure all of you crafty people out there can use your imaginations to make a necklace, bracelet or whatever floats your boat. I wanted a ring, so that's what I made :)
*Some tiny seed beads, *a keyring, *small photo (I resized my photo to 2X1, some photo packages even come with these tiny photo's so if you never knew what you would use them for, now you do:), *stretchy bead cord, a thick/sturdy piece of plastic (I cut mine out of an empty apple juice bottle), *marker, *hot glue, *cardstock, *and some beads or rhinestones. (I also used tweezers for my beading because I have fat fingers, but you don't have to. I'm sure you have perfectly normal, beautiful fingers ;)
(I was kinda flying by the seat of my pants while making this project so I didn't get pictures of every step, if you have any questions please let me know!)
Step One:
On the plastic and cardstock pieces, trace the outside of your keyring, and on the back of the photo trace the inside of your keyring and cut them out. Use some Mod Podge, or a glue stick (either works fine) and glue the plastic piece on top of your photo. Put the cardstock aside until the end.
Step Two:
Tie your beading cord around your keyring. You can slide it in between the two rings and tie a knot for a more secure hold.
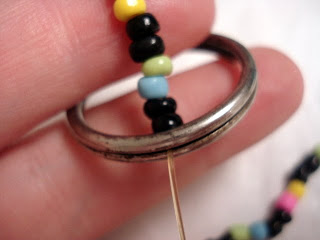
Then measure about 10in and cut. Bead your string in whatever colors you like all the way down until you get about 1.5-2in from the end and tie a knot, about half and inch away from the last bead, so they have room to move.
Then take your keyring and lay it flat on top of the finger you are going to wear your ring, and bring the "tail" of the beads around/under your finger to where it is snug and slide the string trough the keyring and tie a knot. (Does that make any sense?)
Step Three:
Okay, so you have the "ring" part finished, now you need to add your rhinestones, or buttons, or ribbon, or whatever you want to use to embellish, around the top of the keyring. I used these rhinestones and some hot glue, but any kind of sturdy glue would work fine, I was just using what was handy :)
I also added some thin (1/8in) ribbon around the outside of the ring because it was kinda worn.
Step Four:
(This is where it gets tricky because there are NO photos! I will try to use my best descriptive writing skills, but please let me know if something isn't clear)
Now you are going to add your picture. Your Mod Podge should be dry by now so take your picture and cut off the extra plastic around it. Then take your photo and place it on the bottom part of the keyring and press it up until it is snuggly in it's new home. The edges of whatever you used to embellish should keep it from popping all the way through. Then take the cardstock and glue it to the bottom of the keyring to cover the picture and keep it from popping out. Then your done, and it should look something like this:
(sorry for the glare)
So there you have it, your own photo ring! There are so many other things you can do with this idea, but I was using what I had at midnight last night. Most craft stores have the jewelry frames already packaged and ready to go, you just add your beads. Use your imagination and be the crafty person you are to make one all your own :) I'm gonna link this up to Kimba's DIY Day
Don't forget about my giveaway below- it ends on Saturday so be sure and enter soon!
Happy Tuesday-


1 comment:
That is so cute! What a great idea. It looks like it took a lot of patience, too.
Post a Comment