About Me

My photo
Hey, it's Chelsy, with a Y! I am a wife to my sweet prince, and mother to one spunky little princess and one handsome little ham of a prince. Painting is my drug of choice. Wine is good too. I'm known to speak without thinking and eat to much chocolate. I love meeting new people, and learning new things. So this is my journey through some not so glorious moments, some not so intelligent thoughts and some possibly crafty ideas.

Total Pageviews

Powered by Blogger.
Powered By Blogger

Tuesday, November 23, 2010

Don't forget the dog...

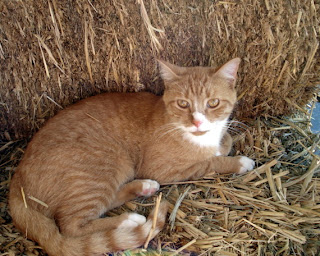
...or the cat! These are a couple of super easy, simple and delicious (don't ask) recipes for the pets or pet lovers in your life. I wasn't totally prepared to do this post, hence the lack of presentation, but I was thinking these would be so cute wrapped up in a little dog bowl with a toy. Or a cellophane bag with a cookie cutter. Or... Well you get the idea, use your imagination peeps :) (BTW-They have tons of pet goodies in Target dollar spot.)

Lucy

Cat
These are our two little recipients. I use the word "little" very loosely for the animal on top, but don't tell her that. And yes we do have matching animals...No, we didn't do it on purpose!


OK, first off Dog Treats:

1 c. Flour
1 c. Wheat Flour
1/2 c. Corn Meal (yellow is fine)
1/2 c. Powdered Milk
1 t. Packed Brown Sugar
1t. Garlic Powder
1/4 t. Salt
Combine all ingredients in a large mixing bowl and toss to combine.
Then add:
1 Beaten Egg
1/2 c Cheddar Cheese
1/4 c Parmesan Cheese
1/3 c. Beef or Chicken broth (warmed)

Mix well and knead 8-10 times on a lightly floured surface. Roll out to 1/2in thickness and cut with cookie cutter. Arrange on ungreased baking sheet and bake at 250 for 1 hour. Cool on wire rack. Makes about 2 dozen, depending on size.

Now, if you want to make this even easier and give it to friends or neighbors, you can just mix up all the dry ingredients and put them in a cute cellophane bag and attach the instructions for the rest of the ingredients.

Cat treats:

1/2 c. Canned Tuna (small can)
1 c. Bread Crumbs
1 T. Oil
1 Beaten Egg
1/2 t. Brewer's Yeast

Mix all ingredients and drop by 1/4 teaspoonfuls onto a greased baking sheet; bake at 350 degrees for 8-10 minutes. Cool to room temperature; store in airtight container. Makes about 4 dozen.

In High School, I volunteered at an animal shelter and made these almost every Saturday to take up there, they were a huge hit! I hope you try these (not literally:) or gift them to the pet lovers in your life! Enjoy!!


Linking to these awesome peeps:

All Things Heart and Home


The DIY Show Off

Make it Yours @ My Backyard Eden

Friday, November 19, 2010

Toddler Turkeys

So, I know the "turkey hands" are everywhere in blog land. However this particular technique was new to me so I thought I would share just in case I'm not the only one out there living under a rock! Have you people ever seen these fabric crayons? All you do is color whatever you want onto a piece of paper, then iron it on to your fabric. I am just amazed! This was the perfect craft for toddlers, and moms who need a couple of quiet minutes:)

I'm not going to give a whole big tutorial on these, but basically you trace your childs hand, let them color it, try to resist the OCD in you to make them color in the lines, and then iron it onto whatever you choose. In our case, we ironed them onto white fabric and then I stitched them onto their t-shirts. (I used embroidery floss and hand stitched everything, but you can use your sewing machine, or if you want to hand stich them, but don't have embroidery floss just double or triple your thread to make it thicker.) Taylor and her cousin Owen had alot of fun "coloring". The only drawback I have found is that you have to hand wash the fabric that you use. So I wouldn't suggest doing this on something your child wears often, unless of course you love to hand wash laundry, I don't. I took a bunch blurry pictures, so hopefully that will help.
 (I am just amazed by the difference in these two hands! I can't figure out if Taylor has little hands, or Jaxon has really big hands. The one on top is a almost three year old, and the bottom one is a four month old!)


 Sorry, I know it's hard to see on the white fabric.
My iron was set to medium-high (5-6) and it takes a while to transfer, so be patient. If you can resist the urge to lift the paper and admire your child's handy work that would be best. But if not, just be careful not to move the paper around.

Cousin Owen colored his hand too!
Here they are on the shirts, obviously Taylors isn't finished, but I wanted to show it to you anyway.


To cute!

So, am I really that far out of the loop, or is this technique new to you to? I hope you try this with the kiddo's, it really was alot of fun!

Happy Friday,

Linking to:

Wednesday, November 17, 2010

Yarn Snowman

My husband has a rule about not decorating for Christmas until after Thanksgiving. Does anybody else have to live with this non-sense? Don't get me wrong, I love, love, loooove Thanksgiving, but I also love Christmas and I think one month of all those lovely decorations and ornaments is just not enough. But never fear, I found a loop hole, just because I can't decorate until after Thanksgiving doesn't mean I can't make decorations :) I know, sneaky sneaky! So without further ado, allow me to introduce Jack Lionbrand:


Jack enjoys playing in the snow, taking long walks by the evergreens, and relaxing far away from the warm fire. He loves carrots and smiling.. His favorite accessories are his signature top hat and scarf.

Isn't he just the cutest?
Don't you want to make one too? I will tell you what I did, but first let me warn you that I am the worlds WORST tutorial writer/photographer, if you have no problem with that then keep reading.

Supplies:
3 White Styrofoam Balls (different sizes or all the same)
White yarn (1 skien is plenty, I had about half of one and ran out during my last ball.)
Block of wood
Paint
Glue
3/8in Ribbon (1 yard each of green, white, red)
Half of a popcicle stick or anything for the lollipop stick
Buttons for eyes, and body or whatever you want to use
Sticks or pipe cleaners or whatever for arms
Fabric or felt
Embellishments (I used modeling clay for the nose and candy pieces.)

Now, if you can't tell by the list of supplies, this is pretty flexible and super easy to do. I just used what I had around the house which means that little cutie didn't cost me a dime! For the next one I make though, I'm going to use super fluffy white yarn ;)

Step 1:
Paint your wood however you like.


Step 2:
Cover your balls haphazardly with yarn, until you get the look you want. If you have a color other than white styrofoam just paint it before you cover it with yarn. That way if you have blank spaces they won't be as obvious. Then glue them together however you choose. I used hot glue.


Step 3: Make your lollipop. Take your ribon and glue all three ends together. Fold the glued end over and glue again. Then just wrap the ribbon around in a circle gluing every couple of turns or so. Be sure you hold the ribbon tight. Glue your popcicle stick to the back, then cut a piece of felt or foam the size of your lollipop and glue it over the popcicle stick on the back of the lollipop to hold it all together. You can add a bow like I did if you want added cuteness. All the pictures I took of this step were blurry beyond repair, but hopefully your cool like me and can figure it out by looking at the picture :)

Step 4:
Glue your snowman to the wood and embellish.
And that's pretty much it. Super cute, super easy, super flexible. That's what I like to see!

(Disclaimer: The laundry and cartoons in the background are not mine, someone broke into my house and left their laundry during saturday morning cartoons. Investigation pending.)


So, did you get any of that or was I just rambling? I really hope I made a little bit of sense because something this adorable shouldn't get passed up by my ignorance :) Have a blast, and please comment of email me if you have any questions! (You can comment me even if you don't have questions also, it would make my day;)
Linking to:


The DIY Show Off


Make it Yours @ My Backyard Eden

Sunday, November 7, 2010

What do you get when you mix a cat and a dragon?

Two very adorable little trick-or-treaters!


Taylor and I went trick-or-treating and on a hay ride while Daddy and Jaxon stayed home and handed out candy. We didn't get a bunch of candy (fine with me:) because at the last minute Taylor decided she didn't want to be a cat, she wanted to be Iron Man! She went to a few houses, but mostly just enjoyed the hay ride. Guess we will try again next year!

Chelsy